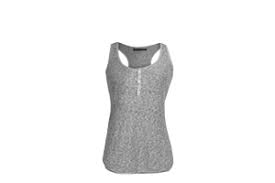
In today’s digital age, photo editing has become an integral part of our visual culture. It’s not uncommon to see perfectly edited photos on our social media feeds, magazines, and advertisements. However, have you ever come across a photo that seems picture-perfect, except for one minor detail – a mannequin? This can be quite frustrating, especially if you’re trying to achieve a professional and polished look in your photos.
But fear not, because in this blog, I will be sharing 5 easy steps to remove mannequins from photos like a pro. Whether you’re a beginner or a seasoned photo editor, these tips will help you seamlessly erase mannequins from your photos.
Step 1: Choose the Right Image Editing Software
The first step to removing mannequins from photos is to have the right tools. While there are plenty of photo editing software available in the market, not all of them may offer the features and tools necessary for this task. Adobe Photoshop and GIMP are two of the most popular and comprehensive image editing software used by professionals and beginners alike. Both these software offer versatile and advanced tools that allow you to edit photos with precision.
Step 2: Select the Right Tool for the Job
Once you have the editing software at hand, the next step is to select the right tool for removing the mannequin from the photo. In Photoshop, you can use the Clone Stamp or Healing Brush tool, while in GIMP, you can use the Clone tool or the Resynthesizer plugin. These tools are designed to help you replace or cover a specific area of the photo seamlessly.
Step 3: Use the Clone Stamp/Clone Tool
Before you begin using the Clone Stamp/Clone Tool, make sure you have a clear idea of the area you want to clone. The Clone Stamp tool essentially copies a part of the photo and pastes it over the desired area. In Photoshop, you can select the Clone Stamp tool from the toolbar on the left. Then, choose the part of the photo you want to clone by holding the Alt/Option key and clicking on it. This will set a sampling point. Now, start brushing over the mannequin, and you will see it disappear and replaced with the cloned area. In GIMP, the process is quite similar; select the Clone tool and set the sampling point by pressing the CTRL key and clicking on the area. Then, brush over the mannequin to replace it with the cloned area.

Step 4: Use the Healing Brush/Resynthesizer Plugin
The Healing Brush/Resynthesizer Plugin tool is another method of seamlessly removing mannequins from photos. This tool works by blending the surrounding pixels to create a smooth and natural-looking transition. In Photoshop, select the Healing Brush tool and click and drag over the mannequin to remove it. The tool will replace the removed area with similar areas from the surroundings, creating a flawless and natural look. In GIMP, you need to install the Resynthesizer Plugin first before you can use it. Once installed, select the area you want to remove with the Magic Wand tool or the Fuzzy Select tool and then go to Filters > Enhance > Heal Selection. This will remove the selected area and blend it with the surrounding pixels.
Step 5: Fine-Tune the Image
Once you’ve removed the mannequin from the photo, take a step back and look at the overall image to see if there’s any touch-up or fine-tuning required. In some cases, the removal process may result in an abrupt or unnatural look. In such cases, you can use the Clone Stamp/Clone Tool or the Healing Brush/Resynthesizer Plugin to further blend any rough edges or imperfections. You can also use the Blur tool or the Sharpen tool to adjust the sharpness of the image and make it look more natural.
Bonus Tip: Use Layer Masks for a Non-Destructive Removal
For a more professional and non-destructive approach, you can use Layer Masks in Photoshop. Layer Masks allow you to make changes to a specific layer without actually altering the original image. This means you can easily revert back to the original photo if needed. Simply create a duplicate layer of the original image, make the necessary edits, and use the Layer Mask to reveal the newly edited layer. This way, if there are any mistakes or areas that need touch-ups, you can just erase the Layer Mask and make the adjustments on the original image without starting from scratch.
Conclusion
Removing mannequins from photos can be challenging, but with the right tools and techniques, it can be done like a pro. Remember to always choose the right editing software, select the appropriate tools, and fine-tune the image for a seamless and natural-looking result. With these 5 easy steps, you can now confidently remove mannequins from your photos and create visually appealing and professional-looking images.


